Context engineering is one of the hardest problems to solve when working with AI agents. It’s no longer just about how capable the model is but also about how you manage the amount of context that is generated through interaction and how you ensure agents remember what is important over time.
I had heard really good things about OpenClaw’s memory management so I decided to give it a go. OpenClaw (formerly known as ClawdBot or Moltbot) has been getting attention for how it handles context and memory, which made it a good candidate to explore this space more hands on.
OpenClaw is an open source project that runs on your own infrastructure, stores context on disk and uses SQLite together with vector memory search to retrieve relevant context (still exploring how this last bit works in practice). The data remains yours and memory is built incrementally as you interact with the agent rather than being hidden behind a managed service.
Since that context and memory can be kept isolated (that’s what OpenClaw is providing so far), I can see how we might be heading towards a future where this sort of framework (whether it’s OpenClaw or another one) lets users keep ownership of their data (context and memory) and not be dependent on a single provider. You can simply plug your data into whatever infrastructure you want or even a managed service that runs it for you.
What I’m discussing in this article is how to manage that content and memory that is built over time and make it portable and secure so if something happens to your infrastructure you can still recover your data and continue using your agent.
The security warnings
Before looking into the setup, it’s worth understanding the risks. This isn’t theoretical, OpenClaw has had real security incidents.
I was reading that researchers found over 30,000 exposed OpenClaw instances accessible over the internet with critical vulnerabilities such as CVE-2026-25253 that allowed attackers to steal authentication tokens and gain full gateway access. The Moltbook breach exposed 1.5 million API tokens.
OpenClaw can read files, execute actions, receive messages from external channels and store conversation history. A misconfigured instance could allow unauthorised users to interact with your AI, prompt injection attacks, exposure of API keys or access to your local network.
The Setup
Here’s the complete structure I created as a docker compose, this setup will allow you to start OpenClaw very quickly and securely. It is intended to be stored in a private Git repository or if you want it to be even more secure, in a on prem or cloud secure storage service.
ℹ️ NOTE
You can get the whole setup here but I still recommend you to follow the steps below to understand the process and the security considerations.
🚨 IMPORTANT
I have included all the configuration files I could locate so far (.env, openclaw.json, auth-profiles.json, etc) in the .gitignore file.
Please review them carefully and make sure the repository remains private at all times.
Do not make this repository public!!!
openclaw_setup/
├── docker-compose.yml      # Container orchestration
├── .env                    # Environment variables (secrets - NEVER commit!)
├── .env.example            # Template for .env (safe to commit)
├── .gitignore              # Protect sensitive files like .env, openclaw.json, auth-profiles.json, etc
├── data/                   # All OpenClaw data (volume mount)
│   ├── openclaw.json       # Configuration (contains tokens - gitignored)
│   ├── agents/             # Agent config and session transcripts (.jsonl)
│   ├── canvas/             # Canvas files
│   ├── cron/               # Cron jobs
│   ├── memory/             # Vector embeddings (main.sqlite) for semantic search
│   └── workspace/          # Agent identity files (.md) and daily memory summaries
└── scripts/                # Helper scripts
    ├── onboard.sh          # Onboarding script
    └── upgrade.sh          # Upgrade script
Step 1: Create the Docker Compose File
Create the docker-compose.yml file:
services:
  # Service for running OpenClaw CLI commands
  openclaw-cli:
    image: ${OPENCLAW_IMAGE:-openclaw:local}
    build:
      context: https://github.com/openclaw/openclaw.git#main
      dockerfile: Dockerfile
    container_name: openclaw-cli
    environment:
      - HOME=/home/node
      - TERM=xterm-256color
      - BROWSER=echo
    volumes:
      - ./data:/home/node/.openclaw
    stdin_open: true
    tty: true
    init: true
    entrypoint: ["node", "dist/index.js"]
    profiles:
      - cli

  # Service for running the web gateway
  openclaw-gateway:
    image: ${OPENCLAW_IMAGE:-openclaw:local}
    build:
      context: https://github.com/openclaw/openclaw.git#main
      dockerfile: Dockerfile
    container_name: openclaw-gateway
    environment:
      - HOME=/home/node
      - TERM=xterm-256color
      - OPENCLAW_GATEWAY_TOKEN=${OPENCLAW_GATEWAY_TOKEN}
    volumes:
      - ./data:/home/node/.openclaw
    ports:
      - "${OPENCLAW_GATEWAY_PORT:-18789}:18789"
      - "${OPENCLAW_BRIDGE_PORT:-18790}:18790"
    command: >
      node dist/index.js gateway
      --bind ${OPENCLAW_GATEWAY_BIND:-lan}
      --port 18789
      --allow-unconfigured
    restart: unless-stopped
    init: true
Security notes:
- The container runs as
nodeuser (UID 1000), not root - Volume mount is limited to
./dataonly, the container can’t access your entire filesystem - Ports are only exposed to your local network by default
The key thing here is that all context stays in the ./data folder. That’s what makes this portable.
Step 2: Create the Environment File (Secrets Management)
🚨 IMPORTANT
This is critical for security. Never hardcode tokens in your docker-compose.yml.
Create .env.example as a template (safe to commit):
# OpenClaw Docker Configuration
# Copy this file to .env and fill in your values

# =============================================================================
# Docker Image Configuration
# =============================================================================

# Docker image name (default: openclaw:local)
OPENCLAW_IMAGE=openclaw:local

# Optional: System packages to install in container during build
# Example: OPENCLAW_DOCKER_APT_PACKAGES=ffmpeg build-essential
OPENCLAW_DOCKER_APT_PACKAGES=

# =============================================================================
# Gateway Configuration
# =============================================================================

# Port for web UI (default: 18789)
OPENCLAW_GATEWAY_PORT=18789

# Port for bridge connections (default: 18790)
OPENCLAW_BRIDGE_PORT=18790

# Network binding mode: localhost, lan, or public (default: lan)
# - localhost: Only accessible from this machine
# - lan: Accessible from local network
# - public: Accessible from anywhere (use with caution)
OPENCLAW_GATEWAY_BIND=lan

# Authentication token for web UI access (REQUIRED)
# Generate with: openssl rand -hex 32
OPENCLAW_GATEWAY_TOKEN=your_secure_token_here

# =============================================================================
# Claude AI Credentials
# =============================================================================

# These are configured during onboarding (docker compose run --rm openclaw-cli onboard)
# Leave empty and run onboarding, or fill in manually if you have them

CLAUDE_AI_SESSION_KEY=
CLAUDE_WEB_SESSION_KEY=
CLAUDE_WEB_COOKIE=

# =============================================================================
# Optional: Messaging Channel Credentials
# =============================================================================

# Twilio (for WhatsApp/SMS)
# TWILIO_ACCOUNT_SID=
# TWILIO_AUTH_TOKEN=
# TWILIO_WHATSAPP_FROM=

# Discord
# DISCORD_BOT_TOKEN=

# Telegram
# TELEGRAM_BOT_TOKEN=
Now create your actual .env file by copying .env.example and filling in the token with a strong token (I recommend using a token generator like this one and pasting the token in your_secure_token_here)
🚨 IMPORTANT
Use a strong, randomly generated token. Never use simple passwords or reuse tokens from other services.
Step 3: Create your gitignore file
This is your first line of defence against accidentally leaking secrets. Your repo should always be private but it’s better to never have any key inside the repo:
# Environment files (contains secrets)
.env
data/.env

# OpenClaw sensitive config (contains tokens)
data/openclaw.json
data/openclaw.json.bak

# Device identity (contains private keys)
data/identity/

# Credentials and pairing (per-setup, contains secrets)
data/credentials/
data/devices/
data/agents/**/auth-profiles.json
data/agents/**/agent/

# Telegram state (per-setup)
data/telegram/

# Runtime files
data/update-check.json
data/completions/

# Docker
.docker/

# Logs
*.log
logs/

# Temporary files
tmp/
*.tmp

# OS files
**/.DS_Store
Thumbs.db

# Editor files
*.swp
*.swo
*~
.idea/
.vscode/

# Backup files
*.bak
*.backup
Step 4: Build and Start
# Create data directory
mkdir -p data

# Build the Docker image (takes 5-10 minutes first time)
docker compose build

# Run the onboarding wizard
docker compose run --rm openclaw-cli onboard

# Start the gateway
docker compose up -d openclaw-gateway
The onboarding wizard will ask you to:
- Acknowledge security warnings - read these carefully!
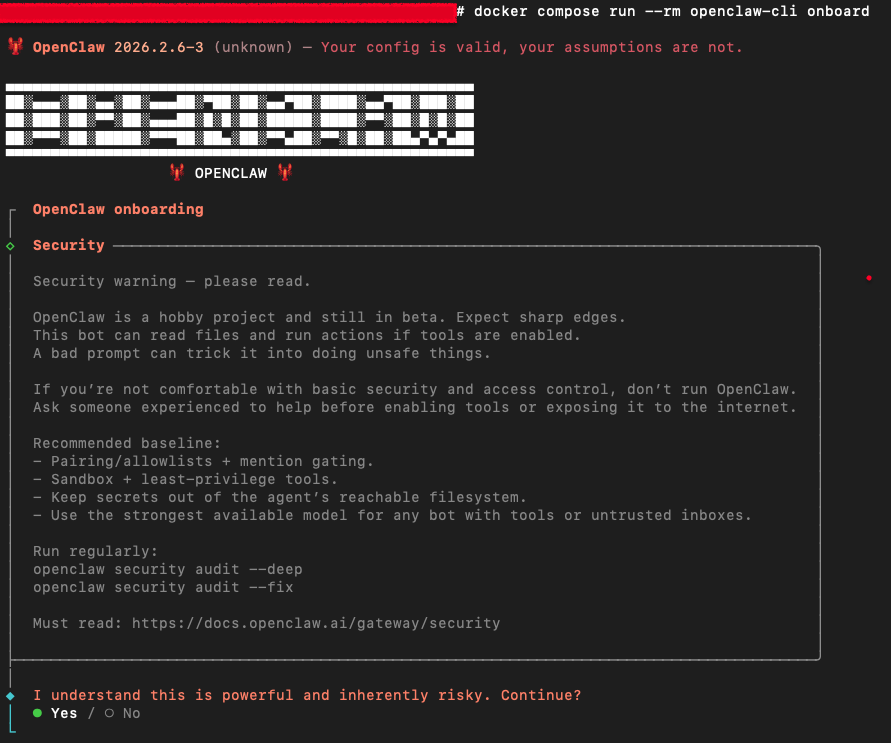
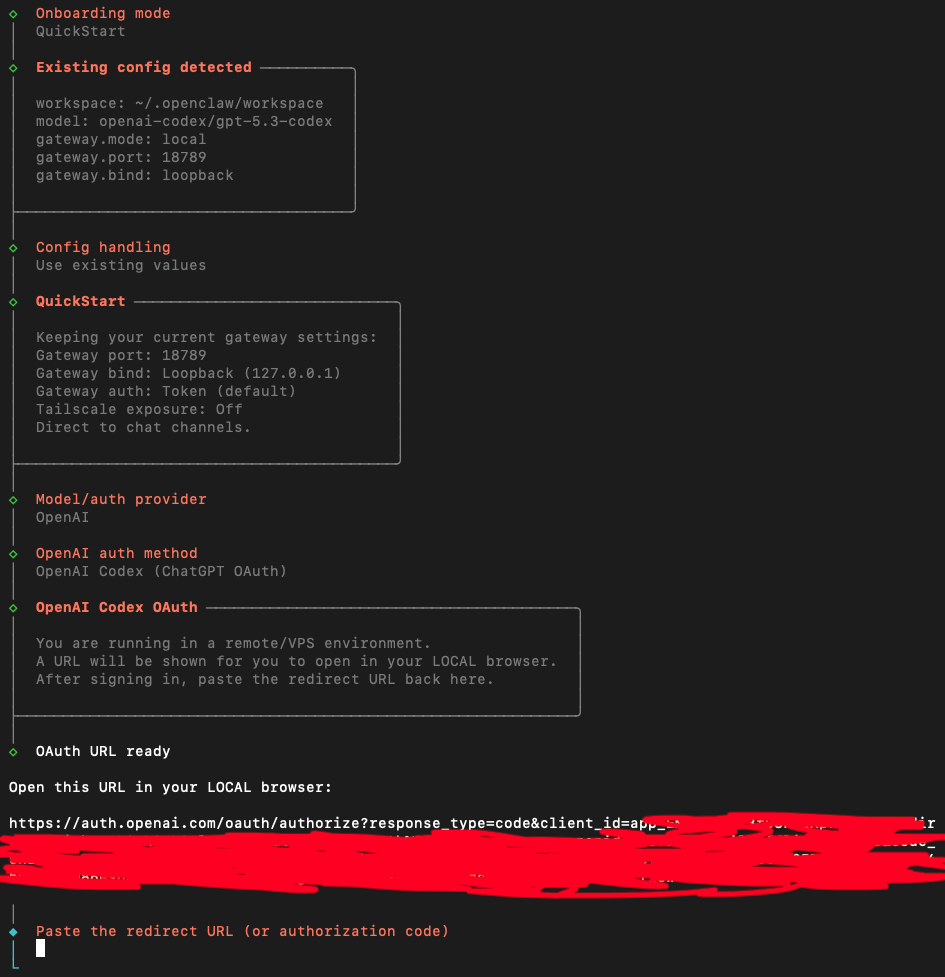
- It will ask you if you want to do a QuickStart or manual, I would recommend a quickstart as it will guide you through the process of setting up your LLM credentials and messaging channels.
- You’ll need to configure your LLM (either using API key or OAuth when supported), in my case I’m using OpenAI where you’ll need to copy the URL into the browser, authenticate and the copy and paste the authorization code into the terminal.
- Set up the communication channel you want to use (Telegram, WhatsApp, etc), I’ll show below how to do it for Telegram.
Step 5: Set Up Telegram and Gateway
This is where many people get security wrong. By default, if you enable Telegram without restrictions, anyone who finds your bot can chat with it. Restrict access from the start.
1. Create the Telegram bot and get your user ID
- In Telegram, open @BotFather, send
/newbot, and follow the prompts. Copy the bot token you receive. - To get your Telegram user ID, message @userinfobot. It will reply with your numeric ID.
2. Add the configuration to data/openclaw.json
Edit data/openclaw.json and add (or merge) the following. Use the same gateway token value you set in .env as OPENCLAW_GATEWAY_TOKEN in Step 2 — that token protects the web UI.
{
  "channels": {
    "telegram": {
      "enabled": true,
      "dmPolicy": "pairing",
      "botToken": "your_bot_token_from_telegram",
      "allowFrom": [
        "your_telegram_user_id"
      ],
      "groupPolicy": "allowlist",
      "streamMode": "partial"
    }
  },
  "gateway": {
    "port": 18789,
    "mode": "local",
    "bind": "loopback",
    "auth": {
      "mode": "token",
      "token": "your_secure_token_setup_in_the_.env_file"
    },
    "trustedProxies": [],
    "tailscale": {
      "mode": "off",
      "resetOnExit": false
    }
  }
}
Replace the placeholders:
| Placeholder | Where to get it |
|---|---|
your_bot_token_from_telegram | From @BotFather after creating the bot |
your_telegram_user_id | Your numeric ID from @userinfobot (as a string, e.g. "123456789") |
your_secure_token_setup_in_the_.env_file | Same value as OPENCLAW_GATEWAY_TOKEN in your .env file |
3. What these settings do
Telegram
| Setting | Meaning |
|---|---|
dmPolicy: "pairing" | Only users who have completed pairing (or are in allowFrom) can DM the bot. Use "allowlist" if you only want the listed user IDs with no pairing. |
allowFrom | List of Telegram user IDs allowed to use the bot. Never use ["*"] in production. |
groupPolicy: "allowlist" | Only groups you explicitly allow can use the bot. |
streamMode: "partial" | Streams responses in chunks for a more responsive feel. |
Gateway
| Setting | Meaning |
|---|---|
bind: "loopback" | Web UI is only reachable from the same machine (localhost). Use "lan" if you need access from other devices on your network. |
auth.mode: "token" | Web UI is protected by the token; anyone with the token can access it. |
4. How Telegram connectivity works
- The container makes outbound HTTPS requests to Telegram’s API (polling).
- No inbound ports need to be open for Telegram.
- Telegram delivers messages to your bot based on the bot token.
5. Restart the gateway
After saving data/openclaw.json:
docker compose restart openclaw-gateway
Post-Installation Health Check
After the gateway starts, run the doctor command to catch any configuration issues:
docker compose run --rm openclaw-cli doctor --fix
This checks for security misconfigurations and can automatically fix common problems.

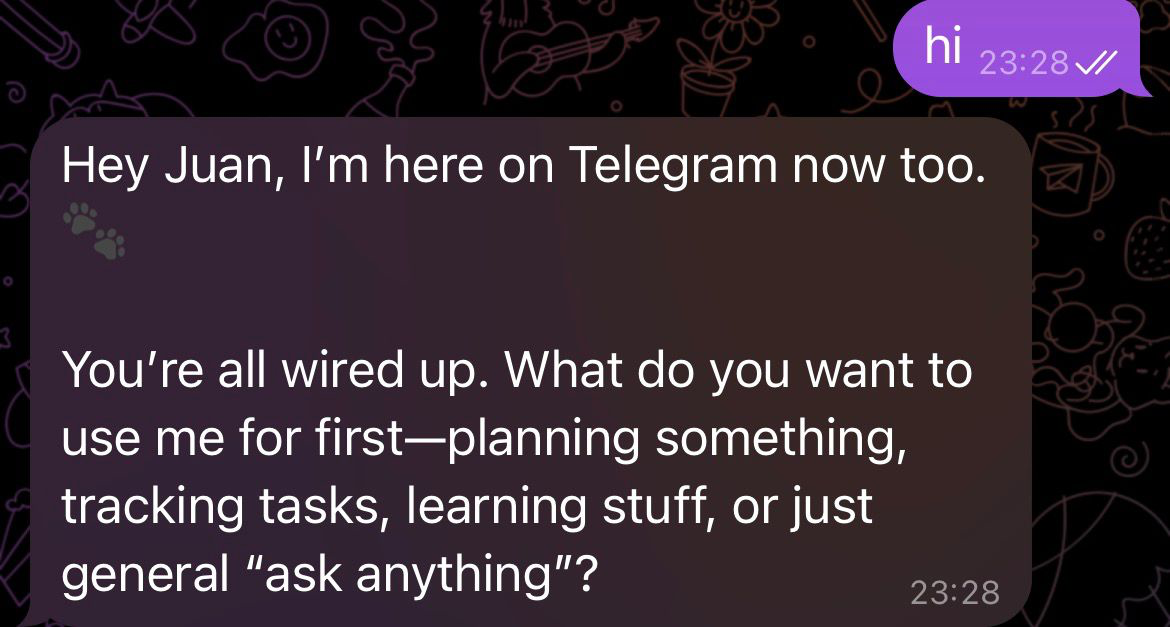
Using the Agent
Once the gateway is running, you can try to contact your agent by sending a message to your Telegram bot. If you agent replies when you are all setup and configured, you are good to go!
If you got this far hopefully you are now running OpenClaw securely and with persistent memory
I’ll be covering more advanced topics in the future so stay tuned!
If you liked this post, you can follow me on 𝕏 for more content like this.