Introduction
I noticed that a lot of folks using Microsoft stack (whether they are .NET developers or users with a technical background) would normally be adverse at using Python. I personally feel is a great language, reasonably easy to learn and almost a must have tool for those trying to work in data science or for this case specifically, building a solution to interact with the OpenAI API.
This is why I decided to create this beginner’s guide on setting up your Windows environment for OpenAI development! In this article, I will cover the basics of installing Python, using pip, creating virtual environments, and debugging code in VSCode. By the end of this article, you will have a solid foundation to start your OpenAI journey using the GPT API and understand how ChatGPT works behind the scene.
1. How to Install Python on Windows
To get started, you’ll need to install Python on your Windows machine. Follow these steps:
- First of all, make sure you don’t have an old version of Python already installed on your local machine, you can check that in your Program and Features in your Windows machine.
- Go to the official Python website (https://www.python.org/downloads/windows/) and download the latest Python installer for Windows.
- Run the installer and make sure to check the box that says “Add Python to PATH” before clicking the “Install Now” button. This will make it easier to use Python from the command prompt.
- Once the installation is complete, open a new command prompt and type
python --versionto verify that Python is installed correctly. You should see the version number you just installed.
2. How to Install Pip
Pip is the default package manager for Python and is used to install and manage Python packages. It is included with Python, so if you followed the steps above, pip should already be installed on your system.
To confirm pip is installed, open a command prompt and type pip --version. You should see the version number of pip.
3. How to Create a Virtual Environment
A virtual environment is an isolated Python environment that allows you to manage dependencies for a specific project, without affecting other projects or the global Python installation. To create a virtual environment, follow these steps:
- Open a command prompt and navigate to your project directory.
- Run the following command to create a new virtual environment named
venv_test:
python -m venv venv_test
- Activate the virtual environment using the appropriate command for your shell:
For Command Prompt:
venv_test\Scripts\activate.bat
For PowerShell:
./venv_test/Scripts/activate.ps1
Once activated, you should see (venv_test) at the beginning of your command prompt, indicating that you are in the virtual environment. I recorded the steps I’ve done in my machine
4. How to Use VSCode to Debug the Code
Visual Studio Code (VSCode) is a popular code editor that offers powerful debugging features. To get started, follow these steps:
- Install Visual Studio Code from https://code.visualstudio.com/download.
- Launch VSCode and open your project folder by clicking on “File” > “Open Folder” and selecting your project directory.
- Install the “Python” extension by Microsoft from the Extensions Marketplace (Ctrl + Shift + X).
- Configure your virtual environment in VSCode by clicking on the “Python” label in the status bar at the bottom left of the window and selecting your virtual environment from the list.
- Create a new Python file (e.g.,
main.py) and write some sample code. - Set a breakpoint by clicking on the left margin next to the line number where you want the debugger to pause execution.
- Click on the “Run” menu > “Start Debugging” or press F5 to start debugging.
- VSCode will now pause at the breakpoint, allowing you to step through your code, inspect variables, and more. See example below
5. Creating a Hello World App with OpenAI
Now that you have your environment set up, let’s create a simple “Hello World” application using the OpenAI API. For this example, we’ll use the OpenAI GPT-4 language model to generate a creative greeting.
Follow these steps:
- Install the
openaipackage inside the virtual environment using pip:
pip install openai
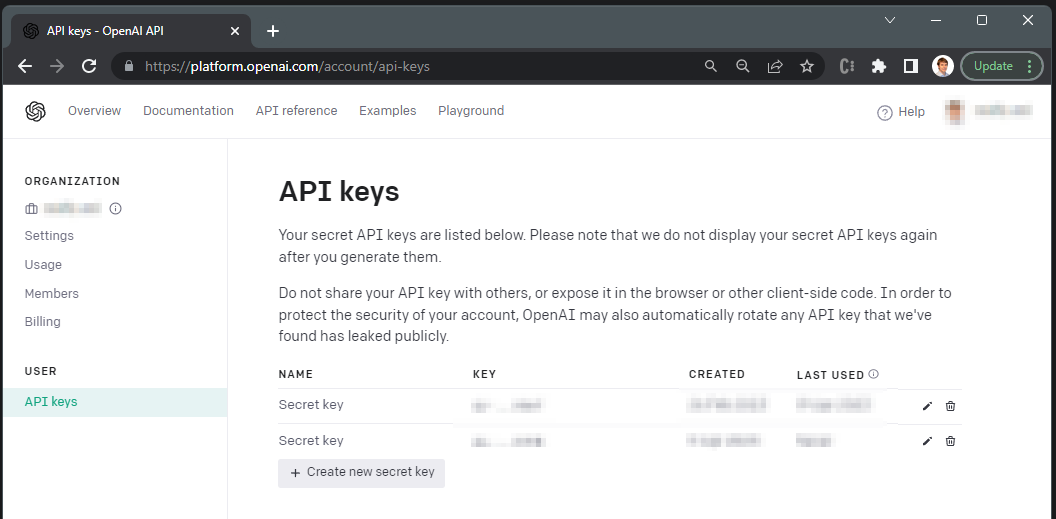
Sign up for an API key on the OpenAI website (https://beta.openai.com/signup/), once logged in you can get your keys from (https://platform.openai.com/account/api-keys)
Save your API key as an environment variable named
OPENAI_API_KEY.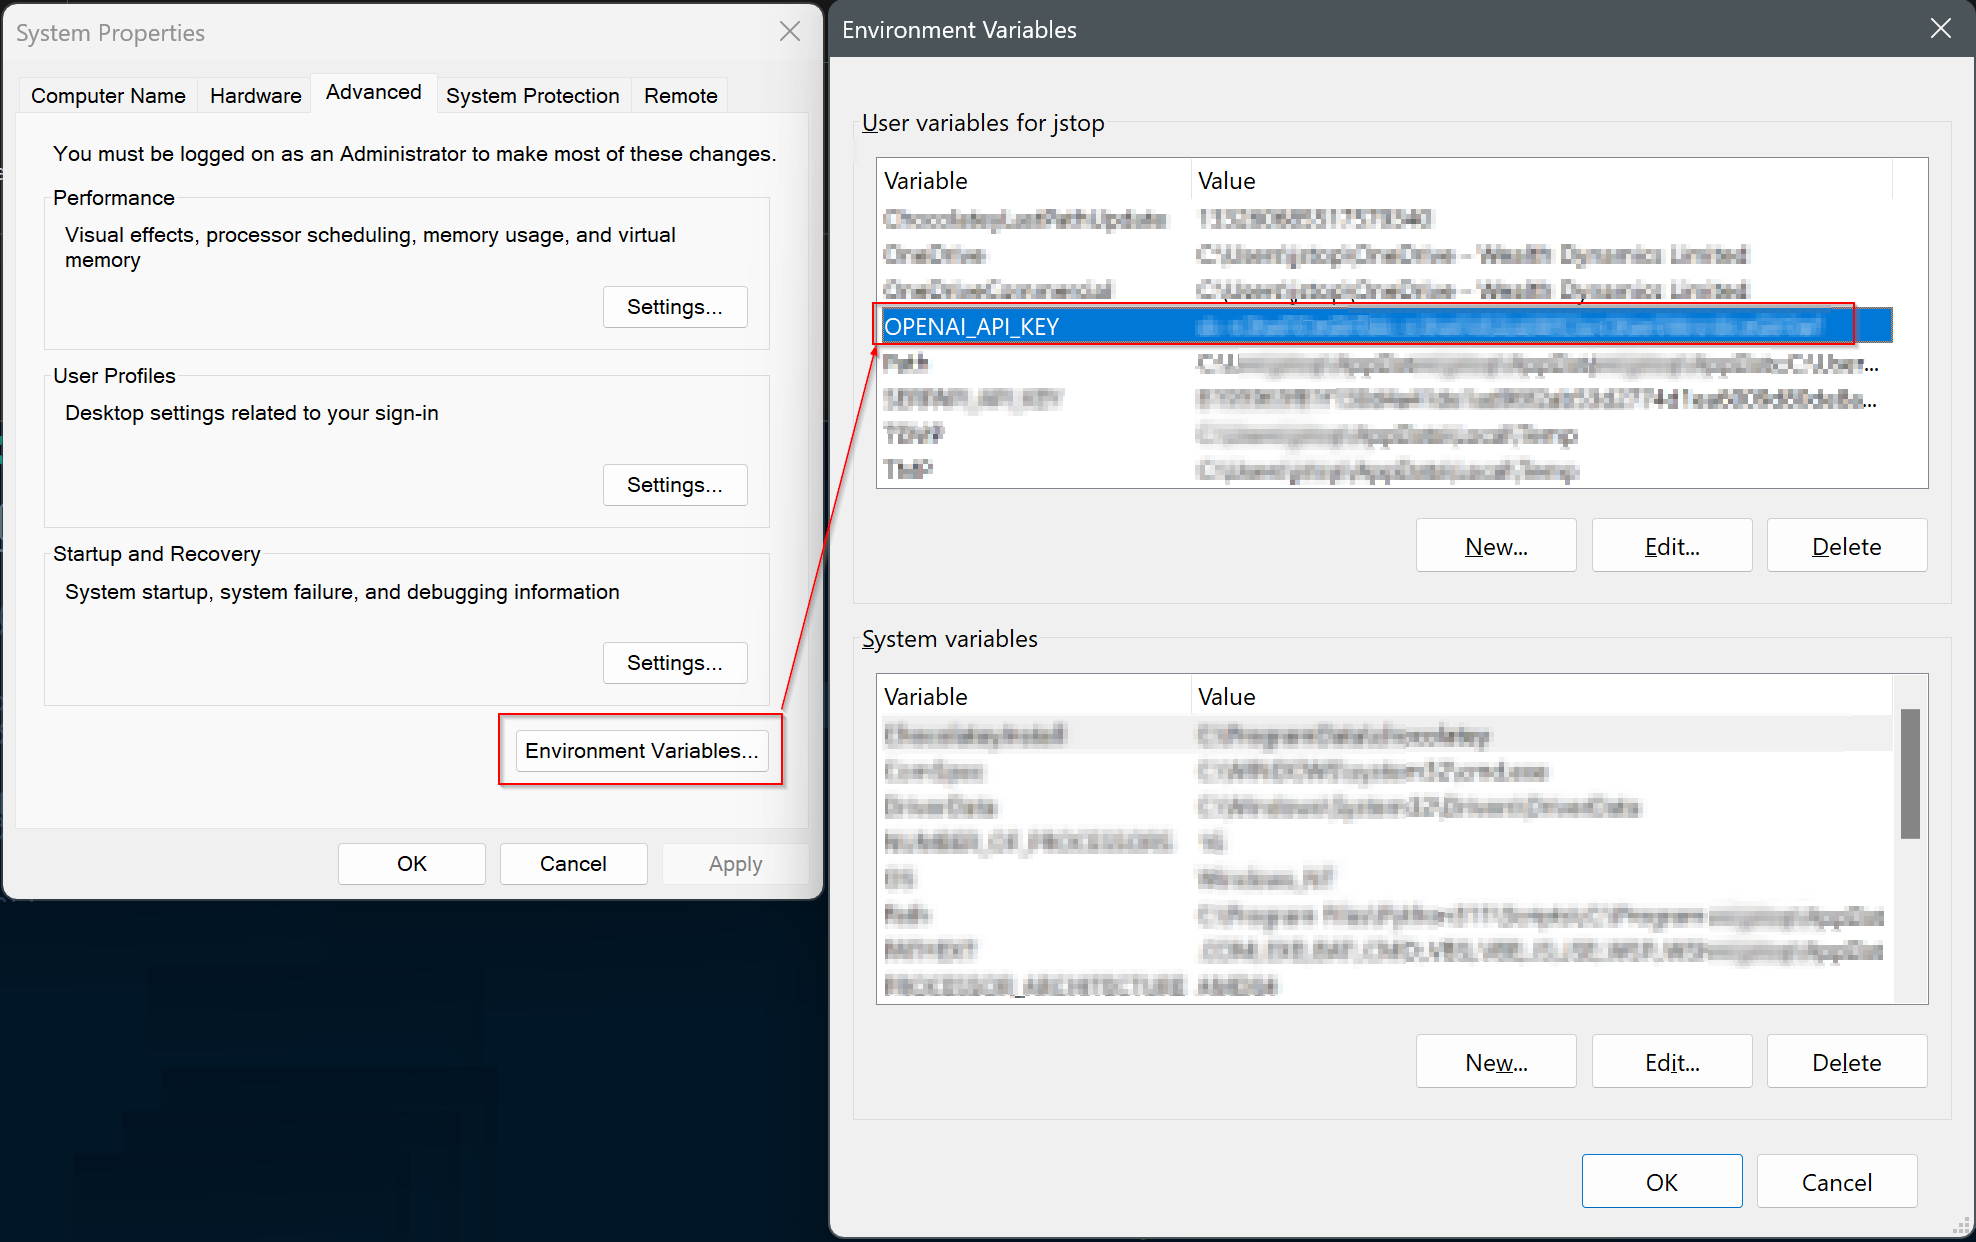
Create a new Python file (e.g., openai_hello_world.py) and add the following code:
from openai import OpenAI
import os

# Create client
client = OpenAI(
    # Load your API key from the environment variable
    api_key = os.environ.get("OPENAI_API_KEY"),
)

# Set up the prompt for the GPT model
prompt = "Create a creative greeting:"

# Call the OpenAI API to generate a response
response = client.chat.completions.create(
    model="gpt-3.5-turbo",
    messages=[{'role': 'user', "content": prompt}]
)

# Print the generated greeting
print(response.choices[0].message.content)
- Run the openai_hello_world.py script in your virtual environment, the script will call the Completion API from OpenAI to generate a creative greeting, it will then print the results to the console.
Conclusion
Well done! You have successfully set up your Windows environment for OpenAI development. You’ve learned how to install Python and pip, create virtual environments, and debug code in VSCode using the openai library. Now you’re ready to dive into the world of OpenAI and start building exciting projects!